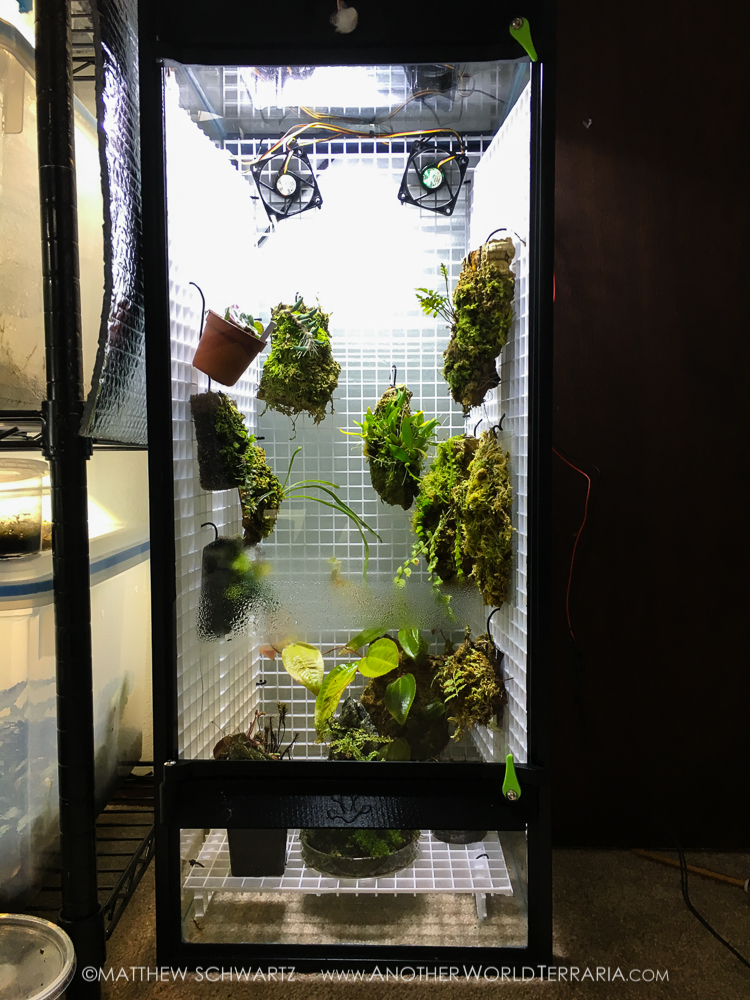
Need a vertical terrarium? One option is the Frog Cube conversion kit, which adapts a horizontal Aqueon tank to a vertical layout. Learn more in this article and video!
For privacy reasons YouTube needs your permission to be loaded. For more details, please see our Privacy Notice.
In This Video
How To Install v6 Frog Cube Conversion Kit 20L to convert your horizontal Aqueon tank into a vertical terrarium with a swinging glass door.
- Complete list of all tools and materials needed (in video and also in description below)
- Detailed instructions and demonstration
Overview
In this video I’m going to show you step-by-step how to install a Frog Cube Conversion Kit on an Aqueon 20 gallon long tank so it becomes a vertical terrarium with a swinging door.
I’ll be using this vertical conversion as a grow tank for epiphytes. In a separate video I’ll show additional tank customizations for that purpose, but in this video I’ll just show the Frog Cube installation.
The Frog Cube kit I’ll be using is the “20H Vertical v6.6 Hinged”, which works with the Aqueon 20 High, as well as the 20 Long that I’ll be using.

Here’s what you’ll need for this project:
- The Frog Cube Conversion Kit – they sell various designs and sizes, so make sure to order the correct kit for your tank and your project goals. I’ll be using 20H Vertical v6.6 Hinged.
- The Aqueon tank – in this case, a 20 gallon Long
- Glass panels cut to size. I bought my glass at Lowes Home Improvement, and they cut it for me. The glass should be 3/32″ thick. For the 20 Long conversion, the glass dimensions are as follows: DOOR should be: 22″ x 11-1/4″ and BASE should be: 4-7/8″ x 11-3/4″
- Aquarium-Safe Silicone for installing and waterproofing the base glass. I’d recommend using a small tube instead of a caulking gun since you need to be able to reach the inside of the tank, which is kind of a tight space
- Wide masking tape to prevent excess silicone mess on the glass. This is optional but advisable to reduce the amount of clean-up work needed later
- Isopropyl alcohol for cleaning the glass
- Paper towels
- X-acto Knife or razor blade for prepping the tank and removing excess silicone
- Wet/Dry sandpaper for the glass. I used CW-220 grit
- Sanding block to make the sanding more even and protect your hand
- Container with water for wetting the sandpaper
- Two towels – one for protecting the glass on the work surface, and one for protecting your hand that holds the glass
- Somewhere you can work on the wet sanding, such as a large plastic sheet
Recommended Safety Equipment
- Goggles to protect your eyes when sanding the glass
- Nitrile or Rubber Gloves for handling silicone
- Respirator to prevent inhaling fumes from the silicone
How to do the conversion
Prep the tank
- With the tank in a vertical orientation, use an exacto knife to remove excess silicone from the inside of the glass and plastic rim where the base glass will be inserted..
- You want to create a channel where you can insert the glass flat against the inside of the rim.
- You’ll also need to remove any excess silicone from around the inside of the top area where the frog cube top adapter will be placed.
Prepare the door glass
- We’ll need to sand and then clean the door panel
- The long edges need to be sanded because they’ll be exposed in the finished project, and the short edges need to be sanded because it makes it much easier to install the door frames.
- Set up your work area as needed to prepare for wet sanding
- I prefer to lay a towel on the surface to protect both the glass and the work surface from damage.
- I use another towel to hold the glass in position while sanding. You can also wet the towel and run it over the glass edge carefully to wet the glass
- Dip your sandpaper in water and then carefully begin sanding the edge of the glass. I prefer to work at a 45 degree angle to the edge of the glass, then 45 degrees to the other side of the edge, then perpendicular to the glass, so I sand flat against the edge.
- Keep track of which edges and corners you’ve sanded, to ensure you get them all.
- Apply more water as needed to keep the edge and sandpaper wet while sanding
- You can use the damp towel to wipe the glass clean every so often as you work.
- After you’ve sanded all edges and corners to be smooth, wipe the glass clean with a wet towel.
- Remove all materials from the work area and lay down dry paper towels.
- Lay the glass flat against the paper towels
- Use isopropyl alcohol to clean the glass on both sides
-
- Since the base glass edges won’t be exposed in the finished project, you don’t need to sand them. Just be careful when working with the base glass.
Begin Assembly and Test Fit
- Now we’re going to do a test fitting of the pieces to ensure everything fits together correctly.
- Since this is just a dry run, you won’t be using silicone in this step.
- First, install the upper frog cube adapter piece
- Hold the adapter at an angle and then rotate it into a horizontal position, while at the same time aligning the left and right grooves with the left and right edges of the tank rim. When the grooves are aligned and the adapter is horizontal, raise it to the top edge of the plastic rim.
- Starting on one end, with the adapter slightly at an angle, snap the adapter clips over the tank rim. You might need to gently wiggle it to get the clips over the edge at first.
- After you’ve worked all the way across to get the clips on initially, go over it again to ensure it’s fully engaged and completely parallel to the top rim of the tank.
- Now, insert the base glass and the lower adapter.
- Carefully insert the base glass, hold it in place against the bottom of the tank and the inside of the plastic rim.
- Now install the adapter. Hold it at an angle and then rotate it into a horizontal position, while at the same time aligning the left and right grooves with the left and right edges of the tank rim. When the grooves are aligned and the adapter is horizontal, lower it onto the top edge of the base glass. Make sure the base glass is aligned with the lower groove of the adapter so it inserts all the way. If the tank or rim isn’t perfectly square in every direction, you might need to slightly shift the glass.
- Attach the upper and lower door frame to the door glass
- The door frame pieces have stops at the end of the insertion channel.
- Insert the glass corner at an angle, against the stop, then carefully rotate the glass and frame together and apply pressure gradually from one end to the other, until the glass is fully inserted into the channel and the frame is snug and parallel to the glass edge
- when installing the opposite door frame piece, ensure that the orientation is correct.
- The hinge and screw should be on the same side of the glass door as they are on the first frame you installed
- Insert the door and test
- Partially Insert the lower screw into the associated hole on the lower adapter piece, and at the same time, align the upper screw with the slot in the upper adapter.
- When both screws are aligned into the hinge holes, lower the door down so the lower screw is fully inserted into the hole.
- Use the included allen key to tighten the upper screw just enough that it pulls the door into the desired place and prevents the upper screw from escaping the slot
- Carefully test the door to ensure it swings freely and everything is working as it should.
- Remove the door and set it aside.
- Remove the base glass and lower adapter
-
- While holding the base glass in place against the inside of the rim with one hand, use your other hand to remove the lower adapter piece, then remove the base glass.
Install the Base Glass
- Use isopropyl alcohol and paper towels to clean the base glass panel and prime the surface for silicone adhesion
- The next few steps are for adding masking tape to the glass. If you’re not going to mask your glass, you can skip ahead to the silicone installation.
- Install the base glass and lower adapter again, as you did in the test fitting
- If desired, apply masking tape to the outside of the glass, just inside the plastic rim, along the bottom and sides.
- Then apply tape on the inside of the panel in the same location.
- I also applied tape to the inside of the left and right sides of the tank and put tape markers to indicate how high to put the silicone.
- Remove the adapter and base glass again
- Add a bead of silicone to the inside of the plastic rim, along the left, right, and bottom.
- Carefully insert the base glass into the tank and press it into position against the bottom and inside of the tank rim, sandwiching the silicone.
- Now apply another bead of silicone along the inside of the glass, where the base glass and tank glass meet, along the left, right, and bottom. Apply a healthy amount of silicone to ensure all of the gaps will be filled
- Wearing gloves, use a single finger to carefully smooth the silicone into the joints. It’s best to do this in as few moves as possible, preferably one smooth movement per edge.
- you might find it helpful to clean your finger off with a paper towel between each edge smoothing.
- I would recommend that you put the frog cube lower adapter onto the glass immediately, to ensure that the silicone and glass cure precisely in the position that is aligned with the adapter. This may vary from tank to tank because sometimes the angles and rim aren’t perfectly square. For example, on my tank, the glass on one side had to be about 1/16″ away from the plastic rim.
- Wait at least a couple of days for the silicone to fully cure, until you can no longer smell any chemicals.
Clean up
- Remove the masking tape
- If desired, trim any uneven or excess silicone with a sharp X-acto knife
Finish Construction
- Attach the door as you did in the test-fitting steps


